Wednesday, 5 June 2013

Nails Inc Dover Street Market & Lowndes Square Review


Today I'm showing you Nails Inc Dover Street Market with Nails Inc's Lowndes Square dotted on the sides of each nail. Dover Street Market is a rich deep purple which is a little lighter than these photos (top photo most colour accurate). It's quite sophisticated and is very long lasting like most other Nails Inc polishes. I decided to pair it with Lowndes Square as I feel these are a great combination and I have used them together before so I knew it was a perfect match. For the dots I used a dotting tool; as you may have notice the top ones didn't stamp out at nicely as I'd have hoped but I actually don't mind the double dot effect. I do need to buy a better dotting tool as this one can be a bit inconsistent and messy. The formula was good; I have had them both for a little while now so they were a bit on the thick side. This definitely isn't my favourite mani but I enjoyed wearing it for a day or so! Now I want something bright and cheery on my nails! May I also mention that you should all visit Dover Street Market. It is amazing, there Comme de Garcons selection is pretty sweet.


Thanks for reading!

Saturday, 1 June 2013

Peach & Polka Dot - Barry M's Peach Melba & Poundshop Nail Wraps!


Here I used Barry M's Peach Melba; a light peach creme. The brush is quite thin making it hard to cover the nail quickly and smoothly, especially on long nails. The formula was a bit on the thick side too so I added some Seche Thinner, making it a bit better. I love the colour!


On my ring fingers I've use some nail wraps I found in Poundland. As you can see it is very bumpy and parts are peeling off which I can't even tell you how much that makes me cringe - catching on clothing *shudders*, but please bear in mind that this is photo a couple of days after I painted this mani. I would also like to point out that I did these nails in a major rush, before I went out, therefore my application was fairly clumsy. 


I added three clear rhinestones from www.bornprettystore.comvertically down on the dots. Unfortunately, one came off that night, and the wraps weren't identical meaning on one finger the rhinestones were perfectly vertical, the other was a bit wonky.


Lastly, a coat of my beloved Seche Vite Dry Fast Top Coat to make them dry instantly before heading out.


Overall these £1.00 nail wraps weren't the best but they do look great if applied properly and with more care. I've found having a quick look at the nail product in the pound shop is sometimes worth it, I've got some great rhinestones from there before and for so cheap!They do only last one day maybe two, after that they will look a mess. The sizes of each wrap weren't considered properly when producing, as some widths don't match up with the others, but that could just be my nails I suppose. I bought a few varieties of these which are still sitting in my drawer, I probably will experiment more with them but when I've got more time and patience on my hands, not to mention steadiness! 


Thanks for reading!

Layla Misty Blush Holographic Nail Polish Review

Today I'm showing you one of Layla's holographic nail polish's - Misty Blush. 


Isn't that a dream?  

I struggled to take good photos of this polish, flash or not. Above is with flash and you can really see the holographic particles in an array of beautiful, changing colours. There's green, copper, yellow, blue and purple all dazzling away in there, plus more. In direct sunlight this shade truly lives up to its claims. However, like most holos, in the dreary light of my room it looks fairly a dull, darker purple but not unlikeable. In very artificial light it looks amazing too.


Apologies for the weird photos but these were the best I could get without them blurring.


Here it is in a weak indoor light, still looking fairly holographic but definitely not as intense. 

The one fault of this polish is you can not use a base coat with it. It may work with a fancy base that I don't have but any other one it pulls and streaks and leaves large bald spots.
This is three coats and even then I could still see bare patches when in front of light. It is pretty difficult to work with, with a base coat. I've been using Orly's Nailtrition as a base and these two do not like each other one bit. However, the formula once dried it is beautiful, it feels very thin on the nails and smooth to the touch. It is quite resilient and lasts for a few days. Another point I should add is a top coat dulls it extremely, which I found out the hard way. It was so upsetting being dazzled by the beauty of it only to be let down once I applied a top coat. Although it does dry really quickly and thin, a top coat is always a must for me to make the mani last as long as it can and be super glossy!

Thanks for reading!

Pink and sparkly gradient - China Glaze and Nails Inc


This is my mani at the moment - the base colour is Totes Pink by Nail Inc for InStyle which I got free in May's InStyle magazine. There were a couple of choices of shades but I chose this girly pale pink colour. Below are photos of this polish on it's own - as you can see it is very pale and a little streaky but not noticeable on the end result. 
Then I sponged on Maybelline's Forever Strong PRO (I think it might be called 285 Pink Shimmer but no promise's on that one, it doesn't have the name on the bottle!) with a make up sponge. I use cheap sponges from E.L.F Cosmetics for £1.50, they do a really good job for nail gradients. 
Next I added one layer of China Glaze's Fairy Dust which I really love, it's like tiny holographic sparkles with a clear base, so you can add it onto any shade to make it pop! 
Finally, a nice coat of Seche Vite Dry Fast Top Coat which is purely amazing. Dries instantly!
I'm loving this mani - it's very girly and looks elegant on my nails; although a little pale on my extremely pale skin!


Tuesday, 14 May 2013

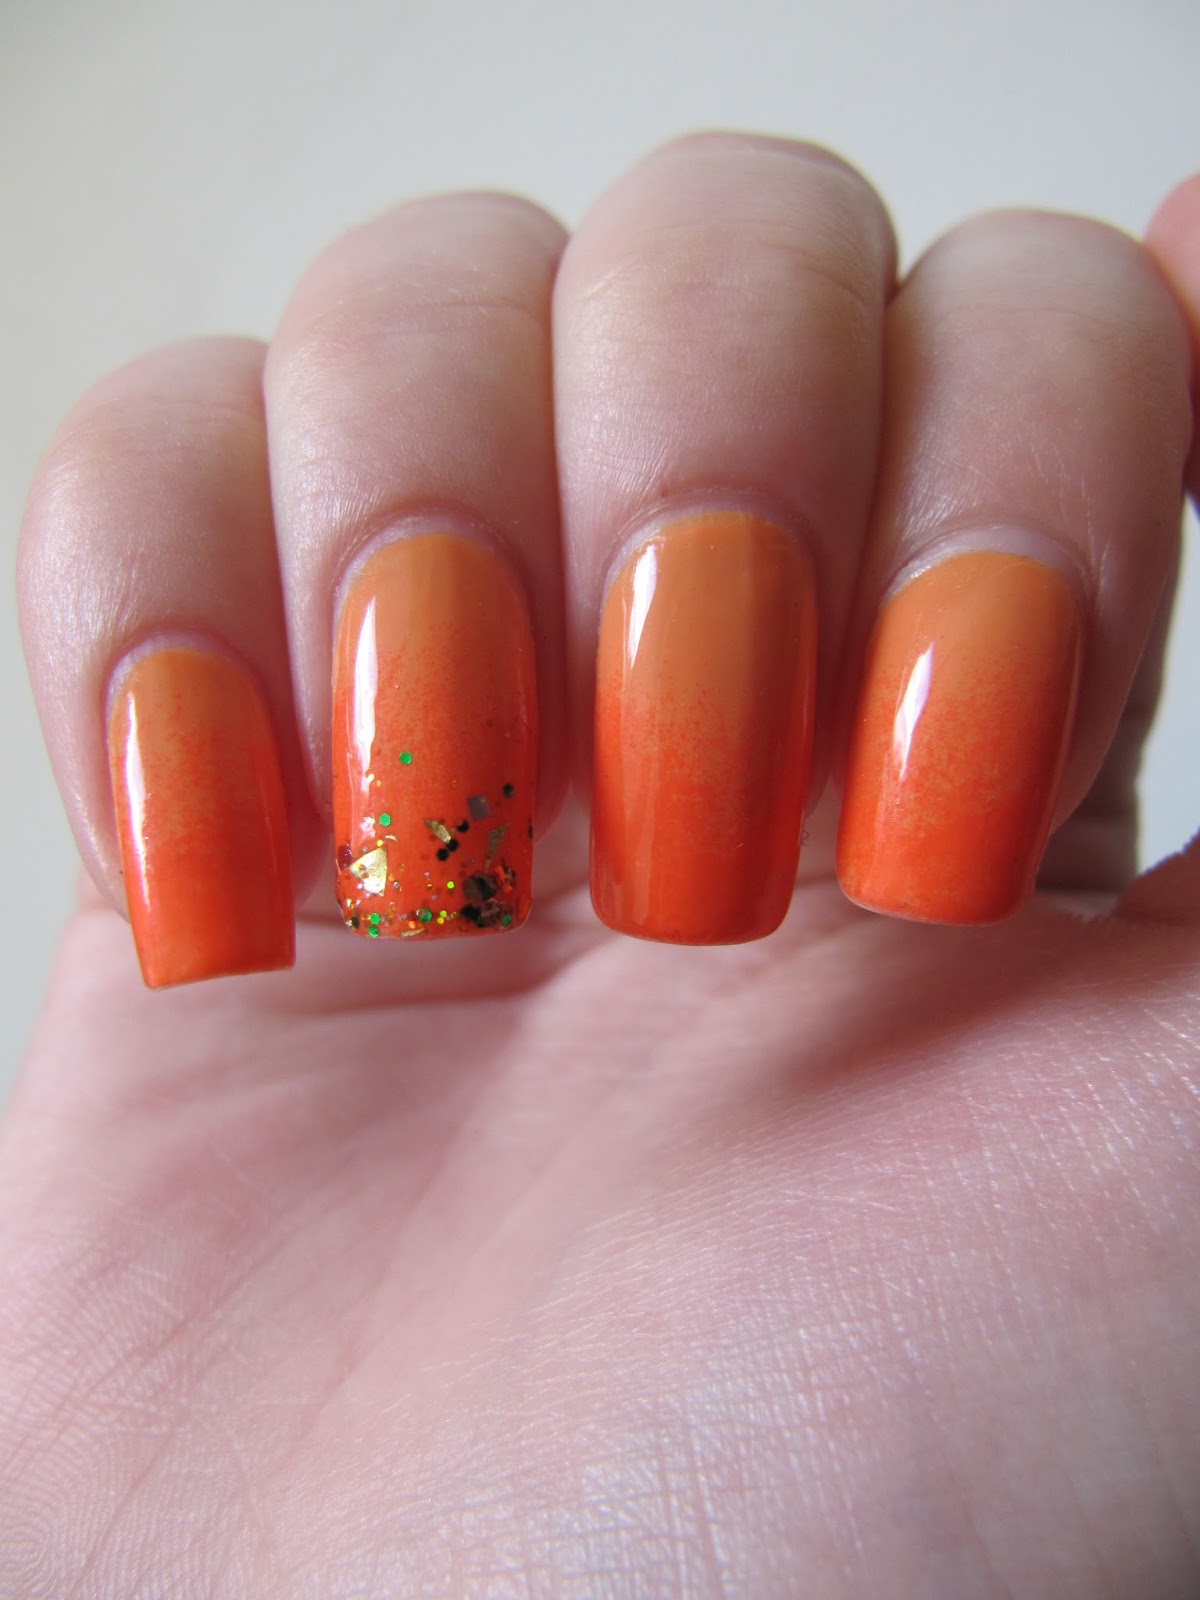
Orange Gradient Nails - Nails Inc, Rimmel & Models Own


These were my birthday nails :) I wanted a very bright colour after having dark on for a while, and I also wanted to include some glitz for the special day!

I used Rimmel Lasting Finish in '705 Tangy Tangerine' for the base, which is a nice peachy orange, along with Nails Inc's 'Portobello', a vibrant orange neon, with a semi-matte finish. This is what I got from a Glossybox. Lastly, on each ring finger I used Models Own - 'Disco Inferno', a very chunky green & gold glitter. Hard to remove but a nice accent to my nails! Of course I finished with a couple of coats of Seche Vite, done!

Black & Blue Gradient Nails - Collection 2000, Frontcover & Rimmel


Even though it's (kind of) summer now, I fancied dark nails.
I used Collection 2000 Lasting Colour in '1 Liquorice" for the black base, Frontcover (unknown name) for the dark semi-sparkly middle section, and Rimmel Lasting Finish in '198 Azure' for the sparkly tips. 
All were fairly cheap polishes and the whole thing lasted very well considering the polishes I used. I painted all nails two coats of black firstly, and to achieve the gradient effect, I used a soft make up sponge to pick up polish from a bit of card / plastic, and dabbed onto the desired area (for the middle colour). Allow to dry and repeat again only covering the tips of nails with a different shade. Then I finished with a nice coat of Seche Vite Dry Fast Top Coat which is the most amazing top coat I've ever come across in my life. If you don't have this then I demand you to buy it now! Please excuse the 'blob' on my ring finger that shows up clearly on the flash photos, I think it was a bubble.